


前回の記事では、Amazon Bedrock AgentCore の Optimization(プレビュー) を使い、本番トレースから Recommendation(システムプロンプトの改善案) を自動生成するところまでを行いました。しかし Recommendation はあくまで「AI が提案した案」です。LLM が生成するものなので、そのまま本番投入するのではなく、本当に良くなるのかを検証してから採用するのが Optimization の本来の流れです。
この第二弾では、生成した改善案を A/B テストで検証し、勝者を**本番構成へ昇格(promote)**するまでを解説します。これで「観測 → 評価 → 改善 → 検証 → 採用」という改善ループが一周します。
この記事でやること
改善ループの「検証」パートを、次の流れで実装します。
改善案を設定バンドル化 → ランタイムがバンドルを読むよう改修 →
Gateway と オンライン評価を用意 → A/B テスト開始 → トラフィック投入 →
結果を確認 → 勝者を昇格前提として、第一弾で作ったデプロイ済みのエージェント(AgentCore Runtime + Observability)、CloudWatch Transaction Search の有効化、AgentCore Evaluations が使えるリージョン(本記事は東京 ap-northeast-1)が揃っているものとします。
A/B テストの仕組みをざっくり理解する
A/B テストは、本番トラフィックを 2 つのバリアントに分割して、どちらが良いかを統計的に比較する手法です。AgentCore の A/B テストでは、次の役者が登場します。
- control(対照群):現行の構成。ここでは「元のシステムプロンプト」。
- treatment(実験群):改善案の構成。ここでは「Recommendation が提案したプロンプト」。
- AgentCore Gateway:トラフィックの入口。セッションごとに control / treatment を振り分ける。割り当ては sticky(同じセッション ID は常に同じバリアントへ)。
- オンライン評価(online eval):各セッションを評価者(例:Helpfulness)で自動採点する。
- 設定バンドル(configuration bundle):プロンプトなどの「動的設定」をコードから切り離してバージョン管理する仕組み。
ポイントは、エージェントのコードは変えずに、設定バンドルの中身だけを差し替えて比較することです。Gateway がリクエストに「どのバンドルversion を使うか」を W3C baggage ヘッダで注入し、ランタイムはそれを読んで振る舞いを変えます。これを config-bundle パターンと呼びます(プロンプトやモデル ID など、設定だけの変更に向く方式です)。
さっそくやってみる
この手順は前回の記事がうまく動作した後に行うことを想定しています。
Step 1. ランタイムが設定バンドルを読めるようにする
まず、エージェント本体がリクエストごとに設定バンドルからシステムプロンプトを読むように改修します。これをやらないと、バンドルを切り替えても挙動が変わらず、A/B テストが意味を持ちません。
AgentCore SDK(bedrock-agentcore 1.8 以上)には BedrockAgentCoreContext.get_config_bundle() というメソッドがあり、現在のリクエストに紐づくバンドルの configuration 辞書を返します。A/B テスト中は Gateway が baggage ヘッダでバンドル参照を注入するので、ランタイムはそれを読むだけです。バンドル参照が無いとき(A/B 非実行時)は空の辞書が返るので、必ずデフォルト値へフォールバックさせます。
Strands エージェントでの推奨パターンは、BeforeModelCallEvent フックでモデル呼び出しの直前にシステムプロンプトを差し替える方法です。エージェントはモジュール読み込み時に一度だけ生成し、フックがリクエストごとにプロンプトを上書きします。
main.pyを以下に置き換えます。
from typing import Any
from collections import OrderedDict
from strands import Agent, tool
import asyncio
from strands.agent.conversation_manager.null_conversation_manager import NullConversationManager
from strands.hooks.events import BeforeModelCallEvent
from bedrock_agentcore.runtime import BedrockAgentCoreApp, BedrockAgentCoreContext
from model.load import load_model
from mcp_client.client import get_streamable_http_mcp_client
app = BedrockAgentCoreApp()
log = app.logger
# Define a Streamable HTTP MCP Client
mcp_clients = [get_streamable_http_mcp_client()]
DEFAULT_SYSTEM_PROMPT = """
You are a helpful assistant. Use tools when appropriate.
"""


def dynamic_config_hook(event: BeforeModelCallEvent):
    """A/B test: read system_prompt from the config bundle and swap it in before each model call.

    When an A/B test is active, the AgentCore Gateway injects the bundle reference
    via W3C baggage headers, and BedrockAgentCoreContext.get_config_bundle() returns
    the matching component's `configuration` dict. If no bundle is in context
    (no A/B test / direct invoke), it returns {} and we fall back to the default.
    """
    try:
        config = BedrockAgentCoreContext.get_config_bundle()
    except Exception:
        config = {}
    event.agent.system_prompt = (config or {}).get("system_prompt", DEFAULT_SYSTEM_PROMPT)


# Define a collection of tools used by the model
tools = []
_INLINE_FUNCTION_NAMES = set()
# Define a simple function tool
@tool
def add_numbers(a: int, b: int) -> int:
    """Return the sum of two numbers"""
    return a+b
tools.append(add_numbers)
# Add MCP client to tools if available
for mcp_client in mcp_clients:
    if mcp_client:
        tools.append(mcp_client)
def _make_conversation_manager():
    return NullConversationManager()
# Reuses one Agent per session_id so each session keeps its own in-process
# conversation history (best-effort; resets on cold start). The cache is bounded
# to 128 sessions with LRU eviction (least-recently-used is dropped and its
# history reset) so a single process serving many sessions cannot leak history
# between them or grow without limit. For durable history, attach a session manager.
def agent_factory():
    cache = OrderedDict()
    def get_or_create_agent(session_id):
        if session_id in cache:
            cache.move_to_end(session_id)
            return cache[session_id]
        if len(cache) >= 128:
            cache.popitem(last=False)
        agent = Agent(
            model=load_model(),
            system_prompt=DEFAULT_SYSTEM_PROMPT,
            tools=tools,
            conversation_manager=_make_conversation_manager(),
            hooks=[
            ],
        )
        # Apply the config-bundle system prompt before every model call (A/B testing).
        agent.hooks.add_callback(BeforeModelCallEvent, dynamic_config_hook)
        cache[session_id] = agent
        return cache[session_id]
    return get_or_create_agent
get_or_create_agent = agent_factory()
def _extract_prompt(payload: dict):
    """Accept harness-style messages[], tool_results[], or plain prompt string payloads."""
    if "messages" in payload:
        return payload["messages"]
    if "tool_results" in payload:
        return [{"role": "user", "content": [{"toolResult": {
            "toolUseId": tr["toolUseId"],
            "status": tr.get("status", "success"),
            "content": tr.get("content", []),
        }} for tr in payload["tool_results"]]}]
    return payload.get("prompt", "")
def _has_inline_function_call(messages) -> bool:
    """Return True if messages contains an assistant toolUse for an inline function tool."""
    if not _INLINE_FUNCTION_NAMES or not isinstance(messages, list):
        return False
    for msg in messages:
        if msg.get("role") == "assistant":
            for block in msg.get("content", []):
                if isinstance(block, dict) and block.get("toolUse", {}).get("name") in _INLINE_FUNCTION_NAMES:
                    return True
    return False
def _is_inline_function_call(event: dict) -> bool:
    """Check if a contentBlockStart event is for an inline function tool."""
    if not _INLINE_FUNCTION_NAMES:
        return False
    cbs = event.get("contentBlockStart", {})
    start = cbs.get("start", {})
    tool_use = start.get("toolUse") if isinstance(start, dict) else None
    return tool_use is not None and tool_use.get("name") in _INLINE_FUNCTION_NAMES
@app.entrypoint
async def invoke(payload, context):
    log.info("Invoking Agent.....")
    session_id = getattr(context, 'session_id', 'default-session')
    agent = get_or_create_agent(session_id)
    prompt = _extract_prompt(payload)
    async for event in agent.stream_async(
        prompt,
    ):
        if not isinstance(event, dict) or "event" not in event:
            continue
        cbs = event["event"].get("contentBlockStart")
        if cbs is not None and not cbs.get("start"):
            continue
        yield event
if __name__ == "__main__":
    app.run()
Step 2. 設定バンドルを「1 つ・2 バージョン」で作る
まず3つの用語を整理します
control(対照群 / コントロール)
比較の「基準」になる側です。今のまま・現行の構成を指します。今回で言えば「元のシステムプロンプト(You are a helpful assistant. Use tools when appropriate.)」で動くバリアントです。A/Bテストでは、この control を物差しにして「新しい案がこれより良いのか悪いのか」を測ります。変化させない側、と考えると分かりやすいです。
treatment(実験群 / トリートメント)
「試したい変更」を入れた側です。今回で言えば「Recommendationが提案した改善プロンプト」で動くバリアントです。treatment は control と1点だけ違う状態にしておき(今回はプロンプトだけが違う)、その1点の効果を測ります。日本語では「処置群」とも訳されます。control と treatment を同時に本番トラフィックへ流し、スコアを比べることで、変更が効果を持つかを判断します。
promote(昇格)
A/Bテストの結果、treatment が良いと分かったときに、その勝者を正式な構成として採用する操作です。agentcore promote ab-test を実行すると、テストを停止したうえで agentcore.json を勝者バージョンへ更新し、以降その構成が既定になります。「実験で勝った案を本番に格上げする」ステップ、というイメージです。
この3つの関係を一文でまとめると、「control(現行)と treatment(改善案)を本番トラフィックで比較し、勝った方を promote(昇格)して本番の既定にする」という流れになります。
そして今回の肝の部分——なぜ「同じバンドルの2バージョン」が必要か——は、promote の制約に由来します。config-bundleパターンの promote は「同一バンドル内のバージョン間でのみ昇格できる」仕様なので、control と treatment を別々のバンドルにすると、比較まではできても最後の promote で弾かれます。だから最初から1つのバンドルに、v1=control(元)、v2=treatment(推奨)とバージョンを重ねておく、というわけです。
A/B テストの config-bundle パターンで後から promote(昇格)するには、control と treatment が「同じバンドルの 2 つのバージョン」でなければなりません。別々のバンドルにすると比較はできても昇格ができないので、最初から 1 つのバンドルにバージョンを重ねる形で作ります。
設定バンドルは、ランタイムの ARN をキーにして、configuration オブジェクトへ system_prompt などの設定を入れる構造です。バージョンは イミュータブル(変更不可) で、更新するたびに git のコミットのように新しいバージョン ID が積み上がります。
バージョン1(control=元プロンプト)を作成
まず control 用のコンポーネント定義ファイルを用意します。{{runtime:MyAgent}} はデプロイ時に実際のランタイム ARN へ解決されるプレースホルダです。
cat > bundle_v1.json <<'JSON'
{
  "{{runtime:MyAgent}}": {
    "configuration": {
      "system_prompt": "You are a helpful assistant. Use tools when appropriate."
    }
  }
}
JSON

agentcore add config-bundle --name PromptBundle \
  --components-file ./bundle_v1.json \
  --commit-message "v1 control: original prompt"

agentcore deploy
agentcore add config-bundle はバンドル定義を agentcore.json に書き込むだけで、実際にサービス上へ作成されるのは agentcore deploy の時です。これで mainline ブランチのバージョン 1 ができます。
バージョン2(treatment=推奨プロンプト)を追記
次に、同じバンドルの configuration.system_prompt を Recommendation の提案に差し替えて、新しいバージョンを重ねます。CLI では「agentcore.json 内のバンドル設定を書き換えて再デプロイ」すると、既存バンドルを検知して新バージョン(親バージョン付き)を自動生成します。
agentcore.json の configBundles にある PromptBundle の system_prompt を、推奨プロンプトへ更新します。
You are a helpful assistant. Use tools when they provide clear value for the task—for example, use calculation tools for arithmetic operations, or data retrieval tools when you lack current information. For questions you can answer directly from your knowledge (general facts, explanations, comparisons), respond without unnecessary tool calls. Before taking any action with real-world consequences (writes, deletions, purchases, external changes), state the planned action clearly and wait for explicit user approval.書き換えたら再デプロイして v2 を作ります。
agentcore deploy作成された 2 バージョンを確認します。
agentcore config-bundle versions --name PromptBundlemainline ブランチに 2 つのバージョン ID が並べば成功です。古い方(v1)が control、新しい方(v2=LATEST)が treatment になります。この 2 つのバージョン ID を後で使うので控えておきます。
Step 3. トラフィックを振り分ける Gateway を用意する
A/B テストはトラフィックを Gateway で分割します。まず Gateway 本体を、対象ランタイムを公開する形で追加します。
agentcore add gateway --name MyGateway --runtimes MyAgent --authorizer-type NONE続いて、Gateway からランタイムへルーティングするターゲットを追加します。ランタイム宛ては http-runtime タイプです。
agentcore add gateway-target \
  --name MyAgent \
  --gateway MyGateway \
  --type http-runtime \
  --runtime MyAgent
Gateway は「入口」、gateway-target は「その入口が実際に転送する先」です。A/B テスト中、Gateway はセッション ID を見てどちらのバリアントに送るかを決め、選ばれたバンドルversion を baggage ヘッダに載せてターゲット(ランタイム)へ渡します。ランタイム側は Step 1 のフックでそれを読み取ります。
Step 4. 各セッションを採点するオンライン評価を用意する
A/B テストは「どちらが良いか」を数値で比べるため、各セッションを自動採点するオンライン評価設定が要ります。評価者は、前回の Recommendation と揃えると比較しやすいです(ここでは Helpfulness)。
agentcore add online-eval --name QualityEval \
  --runtime MyAgent \
  --evaluator Builtin.Helpfulness \
  --sampling-rate 100 \
--enable-on-create--evaluator… 組み込み評価者を名前で指定。Builtin.HelpfulnessやBuiltin.GoalSuccessRateなど。--sampling-rate 100… 全セッションを採点(検証中はサンプル率を高くすると結果が早く溜まる)。--enable-on-create… 作成直後から採点を有効化。
Step 5. まとめてデプロイして状態を確認
ここまでで追加した Gateway・gateway-target・オンライン評価をデプロイします。
agentcore deploy
agentcore status
agentcore status に、ランタイム(READY)、Gateway(1 target)、オンライン評価(ACTIVE / ENABLED)、設定バンドル(PromptBundle)がすべて表示されれば、A/B テストを開始する準備が整っています。
Step 6. A/B テストを開始する
いよいよ本番です。同じバンドル PromptBundle の v1 を control、v2 を treatment として、50:50 で比較します。control は古いバージョン ID を明示し、treatment は LATEST(=v2)を指定します。
agentcore run ab-test -n MyABTest -g MyGateway \
  --mode config-bundle \
  --runtime MyAgent \
  --control-bundle PromptBundle --control-version <v1のバージョンID> \
  --treatment-bundle PromptBundle --treatment-version LATEST \
  --online-eval QualityEval \
  --control-weight 50 --treatment-weight 50
実行すると、実行ロールが自動作成され、テストが ACTIVE / RUNNING になります。表示されるテスト ID を控えておきます。--control-version に v1 の具体的なバージョン ID を渡しています。両バリアントが同じバンドルなので、control も LATEST にすると treatment と同じ版を指してしまいます。control=古い版、treatment=新しい版、と版で区別します。この「同一バンドル・2 版」構成にしておくことで、後の promote が使えます。
Step 7. Gateway 経由でトラフィックを流す
A/B テストは Gateway に届いたトラフィックを分割します。したがって、ランタイムを直接叩くのではなく、Gateway 経由で invoke します。振り分けを発生させるため、毎回セッション ID を変えるのがポイントです。
PROMPTS=(
  "AIエージェントとは何か3行で説明して"
  "12 と 30 を足して"
  "富士山の高さは?"
  "7 と 5 を足して"
  "犬と猫の違いを一言で"
  "光の速さは秒速何キロ?"
  "100 と 250 を足して"
  "Pythonでリストを逆順にする方法は?"
)
for i in $(seq 1 40); do
  P="${PROMPTS[$((RANDOM % ${#PROMPTS[@]}))]}"
  agentcore invoke --gateway MyGateway --gateway-target-name MyAgent \
    --session-id "abtest-$(uuidgen)" "$P"
  sleep 1
done
セッション ID ごとに control / treatment が固定割り当てされるので、ユニークな ID を大量に投げるほど両群にサンプルが溜まります。統計的に意味のある差を見たいなら、各群 50〜100 件以上を目安に、しっかりトラフィックを流します。ツールを使う質問(足し算)と知識で答える質問を混ぜると、プロンプトの違い(不要なツール呼び出しの抑制など)が結果に表れやすくなります。
Step 8. テストを停止して結果を見る
AgentCore の A/B テストは、停止(またはタイムアウト)した時点で結果が確定表示されます。実行中は「採点中」の表示のままなので、十分なトラフィックを流したら停止します。
agentcore stop # 対話で対象テストを選択(またはコンソールの Stop ボタン)停止後、結果を確認します。
agentcore view ab-test <テストID> --json | python3 -m json.toolresults.evaluatorMetrics に、評価者ごとの結果が入ります。読み方はこうです。
controlStats.mean… control(元プロンプト)の平均スコア。variantResults[].mean… treatment(推奨プロンプト)の平均スコア。absoluteChange/percentChange… control からの変化量。isSignificant… 統計的に有意な差か(内部的に p 値 < 0.05 かどうか)。sampleSize… 採点されたセッション数。
例えば treatment の平均が control より高く isSignificant: true なら、「改善は統計的に有意」と判断できます。逆に差が小さく isSignificant: false なら「有意差なし=少なくとも悪化はしていない」という結果で、これはこれで採用判断の材料になります。
(おそらく数度プロンプトを流した程度では2つの差は出ないと思われます)
Step 9. 勝者を本番構成へ昇格する
検証で treatment が良いと判断できたら、**勝者を昇格(promote)**します。promote はテストを停止したうえで、agentcore.json を勝者バージョンへ更新します。
agentcore promote ab-test --id <テストID>もし control と treatment を別々のバンドルにしていると、promote は「同一バンドルの 2 版でないと昇格できない」と拒否します。config-bundle パターンで昇格まで見据えるなら、必ず 1 つのバンドルにバージョンを重ねてください。逆に言えば promoteの必要がなく評価のみを行うなら異なるバンドルでも問題ありません。
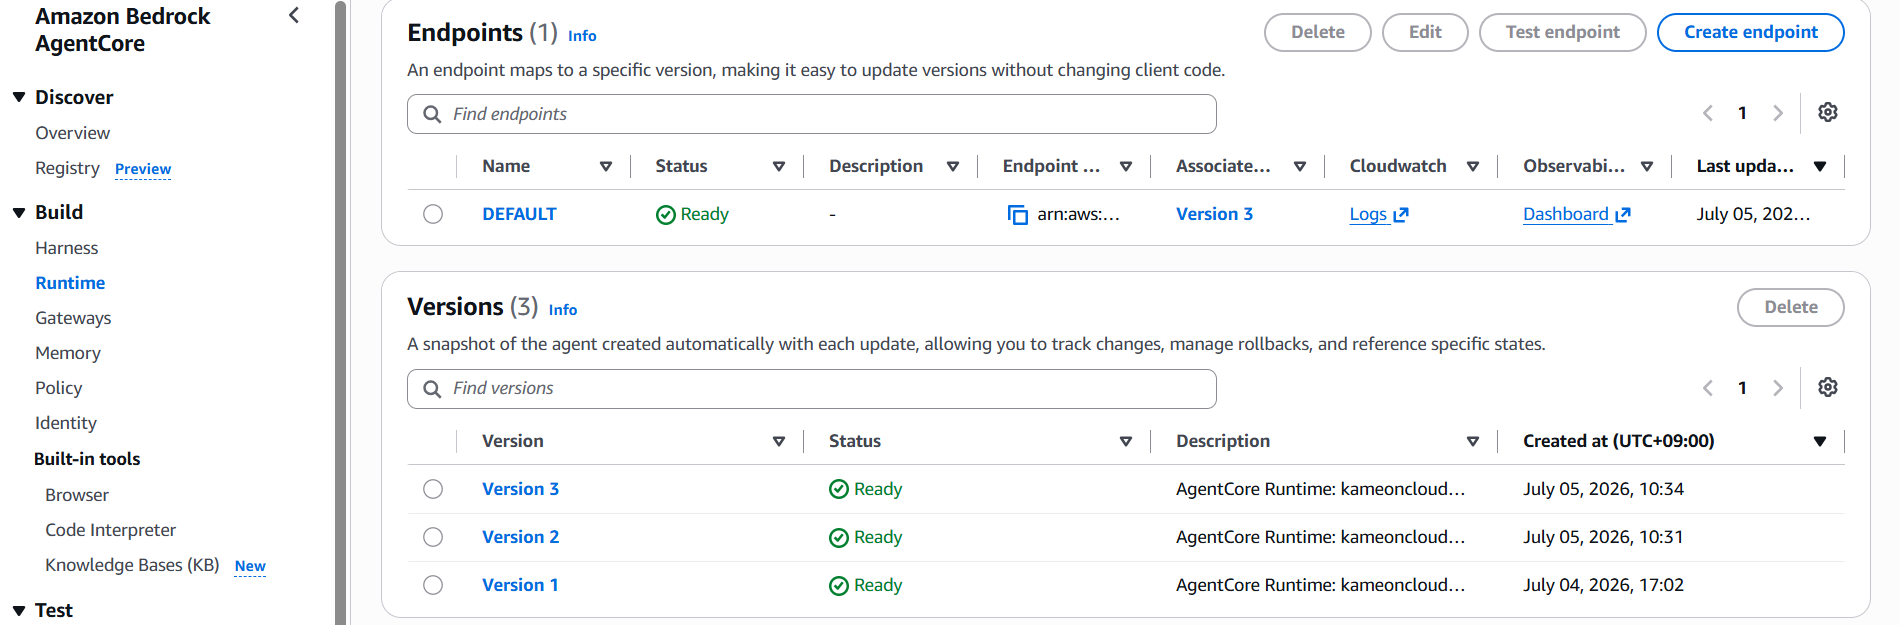
コンソールでいえば Runtime のこのバージョン間は昇格が行えます。
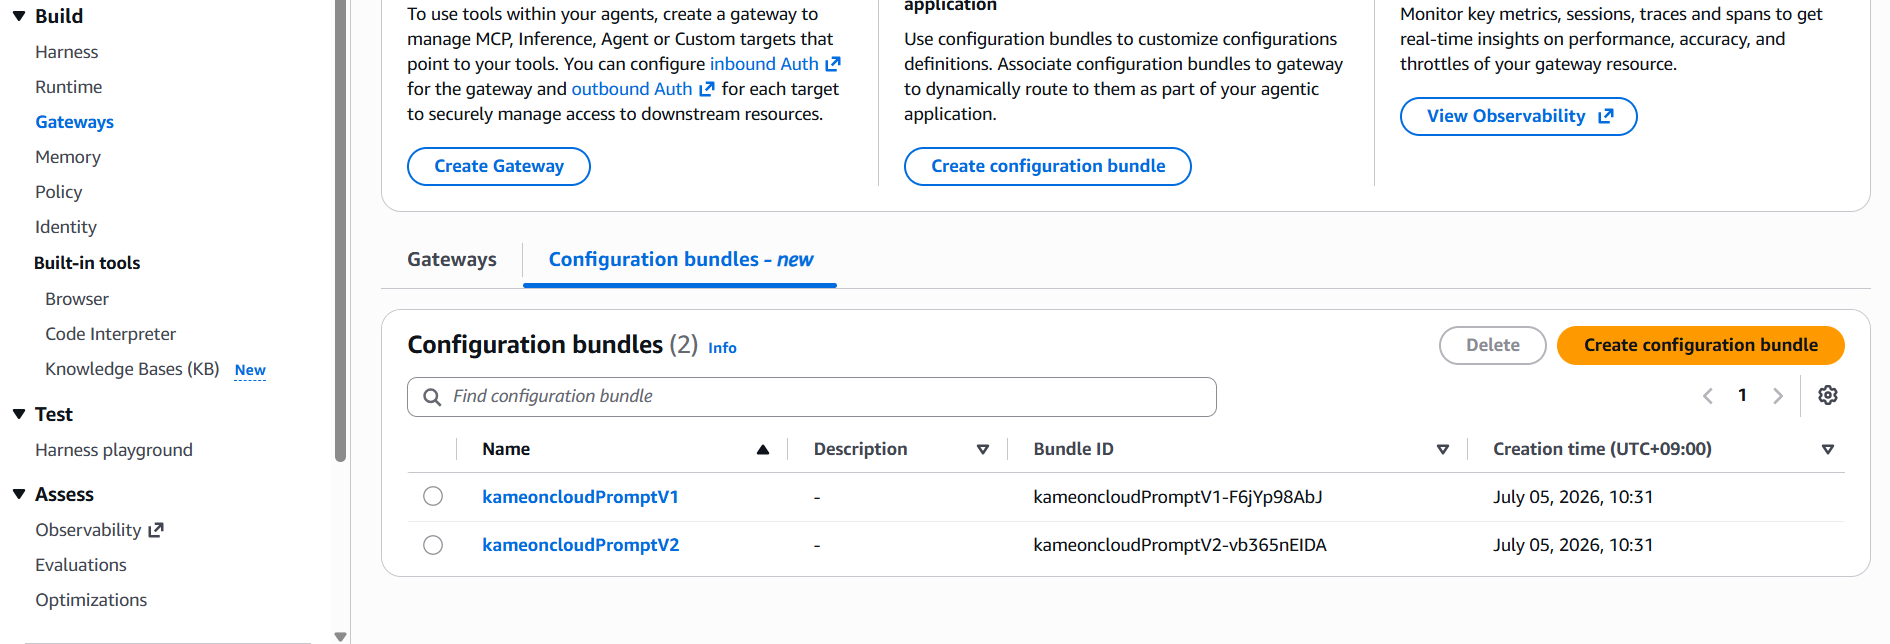
Gateway のこの Configuration bundles では昇格が行えませんので注意してください。