

AWS re:Invent 2025 で最大1年間のタスク実行が可能な AWS Lambda Durable Functions がアナウンスされました!
AWS Lambda Durable Functions
関数の中に複数のStepとCheckPointを含んだ処理を書いておくことにより、組み込みの再試行や進捗状況の追跡が可能となっています。例えばとある外部処理を呼び出すStepの後、呼び出された外部処理が終わるまでの間一時的に処理待ち状態となりその間はCPU課金がされないため、コスト効率に優れた状態で長期にわたる処理を書き込むことが可能です。
複雑な条件分岐や同期処理が伴うものはコードの分離により管理簡素化を目的として引き続き AWS Step Functions を使うことが推奨されますが、ちょっとした処理だけであれば AWS Lambda Durable Functions だけで完結させることができるため、新しい選択肢が生まれた、といえます。
CheckPointと Step / Wait
Durable Functions を理解するために必要な概念が、`CheckPoint`、`Step`、`Wait`です。
Step:context.step()メソッドによりコードが実行されます。Step完了時にはCheckPointが作成されステータスが記憶されれます。関数の再開時に処理済のStepはスキップされます。
Wait:context.wait()メソッドは指定された期間実行を一時停止します。その間LambdaのCPU課金は停止されます。AWSが提供している基本サンプルでは `sleep`による自動再開が使われていますのが、そのほかに context.wait_for_callback が定義されており外部からのCallBackで再開も可能になっています。
なお、従来Lambdaの処理は最長15分でしたが、この機能を使うことで wait を入れず stepのみのコーディングで15分を越える処理を行わせることが可能です。
さっそくやってみる
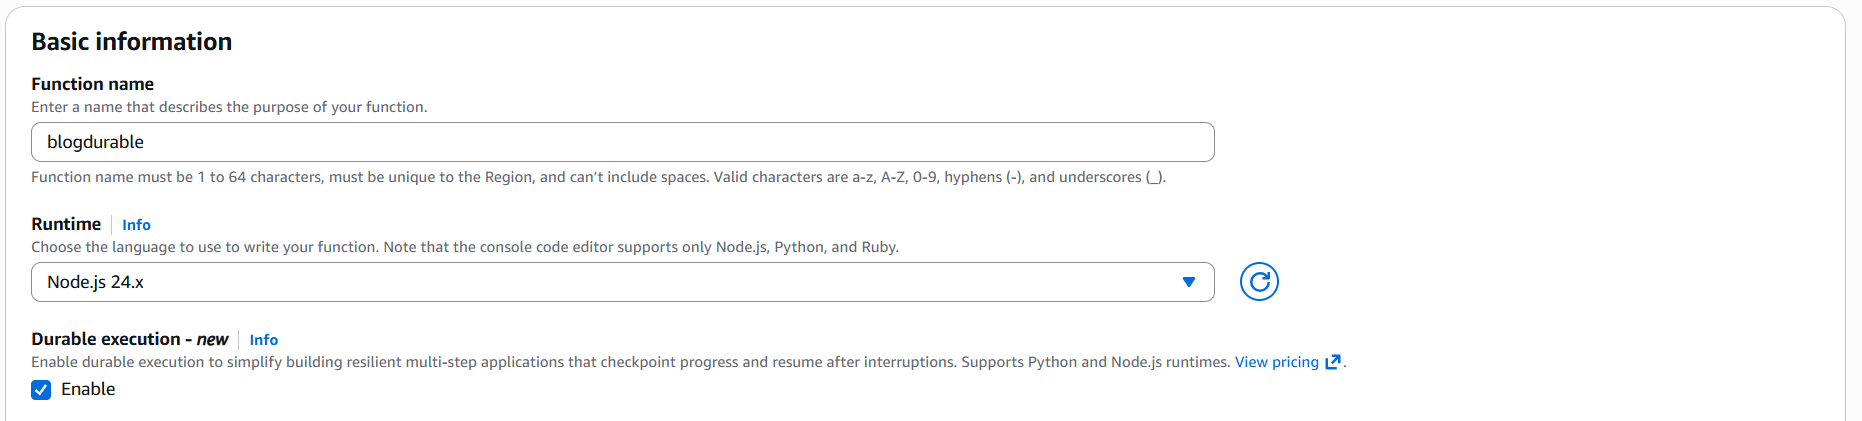
まずはデフォルトの Hello World を試します。OregonリージョンでLambda関数を作成する際に新しいオプションが選択可能となっています。
あとはそのままデフォルトで作成するだけです。このサンプルは入力を取りませんのでマネージメントコンソールから普通に`Test`をクリックして実行します。
import { withDurableExecution } from '@aws/durable-execution-sdk-js';

export const handler = withDurableExecution(async (event, context) => {
  // TODO implement

  await context.step('Step #1', (stepCtx) => {
    stepCtx.logger.info('Hello from step #1');
  });

  // Pause for 1 second without consuming CPU cycles or incurring usage charges
  await context.wait({ seconds:1 });

  // Context logger is replay aware and will not log the same message multiple times
  context.logger.info('Waited for 1 second');

  const message = await context.step('Step #2', async () => {
    return 'Hello from Durable Lambda!';
  });

  const response = {
    statusCode: 200,
    body: JSON.stringify(message),
  };
  return response;
});
まずは1番目のStepで以下が実行されます。
  await context.step('Step #1', (stepCtx) => {
    stepCtx.logger.info('Hello from step #1');
  });
この次に1秒のWaitを発生させています。
await context.wait({ seconds:1 });その後処理が再開されますが、CheckPointには Step1 完了のステータスが記憶されていますので、 Step2 から実行が再開されています。
  const message = await context.step('Step #2', async () => {
    return 'Hello from Durable Lambda!';
  });
カスタマイズしたサンプル
デフォルトのサンプルでは wait で1秒の待ちを発生させ処理を再開させていますが、実際にはここにビジネスロジックを支えるコードが入ります。以下のページに様々なサンプルが含まれています。
https://docs.aws.amazon.com/lambda/latest/dg/durable-examples.html
wait 後の再開は 時間経過かコールバック(context.wait_for_callback)、どちらかの再開のサンプルとなっていますが、このブログではよりシンプルな手順を試してみます。
import { withDurableExecution } from "@aws/durable-execution-sdk-js";

export const handler = withDurableExecution(
  async (event, context) => {
    const { username, email } = event;

    context.logger.info(`ユーザー登録処理開始: ${username}`);

    // Step 1: ユーザー情報を検証
    const validationResult = await context.step(async (stepContext) => {
      stepContext.logger.info(`ユーザー検証中: ${username}`);

      if (!username || !email) {
        throw new Error("ユーザー名とメールアドレスは必須です");
      }

      return {
        username,
        email,
        status: "validated"
      };
    });

    context.logger.info(`検証完了: ${JSON.stringify(validationResult)}`);

    // Step 2: 外部APIに処理リクエストを送信(非同期処理を開始)
    const jobId = await context.step(async (stepContext) => {
      const url = "https://kameda.requestcatcher.com/start-job";

      const data = {
        username,
        email,
        timestamp: new Date().toISOString(),
        message: "非同期処理を開始"
      };

      try {
        const response = await fetch(url, {
          method: 'POST',
          headers: {
            'Content-Type': 'application/json'
          },
          body: JSON.stringify(data)
        });

        stepContext.logger.info(`処理開始リクエスト送信: ${response.status}`);

        // 実際のAPIではジョブIDが返されることを想定
        // ここでは仮のIDを生成
        const jobId = `job-${Date.now()}`;

        return {
          jobId: jobId,
          startTime: new Date().toISOString()
        };
      } catch (error) {
        stepContext.logger.error(`APIエラー: ${error.message}`);
        throw error;
      }
    });

    context.logger.info(`ジョブID: ${jobId.jobId} - ポーリング開始`);

    // Step 3: ポーリングで結果を確認(最大10回、各5秒待機)
    const maxAttempts = 10;
    const pollIntervalSeconds = 5;
    let jobCompleted = false;
    let jobResult = null;

    for (let attempt = 1; attempt <= maxAttempts; attempt++) {
      context.logger.info(`ポーリング試行 ${attempt}/${maxAttempts}`);

      // 5秒待機
      await context.wait({ seconds: pollIntervalSeconds });

      // 外部APIのステータスを確認
      const statusCheck = await context.step(async (stepContext) => {
        const statusUrl = `https://kameda.requestcatcher.com/check-status/${jobId.jobId}`;

        try {
          const response = await fetch(statusUrl, {
            method: 'GET',
            headers: {
              'Content-Type': 'application/json'
            }
          });

          stepContext.logger.info(`ステータス確認: ${response.status}`);

          // 実際のAPIでは、レスポンスボディにステータスが含まれる
          // ここでは仮の判定:200なら完了と見なす
          if (response.status === 200) {
            return {
              completed: true,
              status: "success",
              data: {
                username,
                email,
                processedAt: new Date().toISOString()
              }
            };
          } else {
            return {
              completed: false,
              status: "processing",
              attempt: attempt
            };
          }
        } catch (error) {
          stepContext.logger.error(`ステータス確認エラー: ${error.message}`);
          return {
            completed: false,
            status: "error",
            error: error.message
          };
        }
      });

      context.logger.info(`ステータス確認結果: ${JSON.stringify(statusCheck)}`);

      if (statusCheck.completed) {
        jobCompleted = true;
        jobResult = statusCheck;
        context.logger.info(`処理完了を確認しました(試行${attempt}回目)`);
        break;
      }

      context.logger.info(`まだ処理中... 次の確認まで${pollIntervalSeconds}秒待機`);
    }

    // Step 4: タイムアウトチェック
    if (!jobCompleted) {
      throw new Error(`タイムアウト: ${maxAttempts * pollIntervalSeconds}秒以内に処理が完了しませんでした`);
    }

    // Step 5: ウェルカムメッセージを送信
    const welcomeResult = await context.step(async (stepContext) => {
      stepContext.logger.info(`ウェルカムメッセージ送信: ${email}`);

      const message = `ようこそ、${username}さん!外部システムの処理が完了し、登録が完了しました。`;

      return {
        username,
        email,
        message,
        status: "sent"
      };
    });

    context.logger.info(`メッセージ送信完了: ${JSON.stringify(welcomeResult)}`);

    // 最終結果を返す
    return {
      status: "completed",
      username,
      email,
      message: welcomeResult.message,
      jobResult: jobResult,
      totalWaitTime: `約${pollIntervalSeconds * (jobResult.attempt || 1)}秒`
    };
  }
);
テストイベントを以下で作成してテストします。
{
  "username": "太郎",
  "email": "taro@example.com",
  "callback_id": "abc123-def456-ghi789",
  "message": "このcallback_idを使って承認してください"
}
以下のプロセスで動作します。
- Step1
与えられたテスト用JSONから情報を受け取ります。
- Step2
指定された任意のAPIに値をPOSTします。(処理を依頼する想定)
- Step3
5秒のwait を入れてStep2で依頼したjobのステータスをポーリングします。Status 200 以外が戻るようであれば再度 5秒のwait を入れ、Status 200 が戻るまで10回この処理を繰り替えします。
- Step4
Step3が失敗した場合(50秒以内に処理が終わらない場合)エラー処理を行います。正常終了の場合スキップされます。
- Step5
処理結果を受け取り最終的なレスポンスを生成します。
以下の結果がコンソールに表示されれば完了です。
Status: Succeeded
Test Event Name: test

Response:
{
  "status": "completed",
  "username": "太郎",
  "email": "taro@example.com",
  "message": "ようこそ、太郎さん!外部システムの処理が完了し、登録が完了しました。",
  "jobResult": {
    "completed": true,
    "status": "success",
    "data": {
      "username": "太郎",
      "email": "taro@example.com",
      "processedAt": "2025-12-09T03:33:44.743Z"
    }
  },
  "totalWaitTime": "約5秒"
}